Golf Course
A Course That Suits Everyone to a Tee
Oakwood’s challenging 18-hole golf course designed by legendary course designer Pete Dye is considered by golfers to be one of the gems of the Quad Cities. The course will test all facets of your golf game, especially your short game. The course offers challenging play for golfers at every skill level and requires a wide variety of shot-making skills.
Oakwood Country Club has a long history hosting a PGA Tour Event from 1975 through 1999
In 1975, the event was renamed the Ed McMahon-Jaycees Quad Cities Open, and moved to Oakwood Country Club in Coal Valley, Illinois. It stayed there until 1999, under various names, including the Miller High LIfe Quad Cities Open, the Lite Quad Cities Open, the Hardees Golf Classic, and the Quad City Classic. Some highlights over those 24 years include…
1975 –Tour rookie Roger Maltbie coming from seven shots back on Sunday to score the first of five career wins.
1982 – Payne Stewart donned the plus-fours and Hogan cap that would become his trademark early in the week. He then added some substance to his style by posting the first of his 11 career wins. With a 7-under final round of 63 – still the lowest closing round by a Q-C winner.
1996 – Playing in his third event as a pro, Tiger Woods took his first lead on the PGA Tour with a second-round 64 and led Fiori by a shot heading into Sunday’s final round. In front of a crowd that included a dozen national media members who had scrambled to get the Q-Cs that morning, Woods quadruple-bogeyed the fourth hole, then four-putted at No. 8 to fall out of contention. He rallied to finish tied for fifth.
Hole-by-Hole
#1 Par 5 / HDCP #13
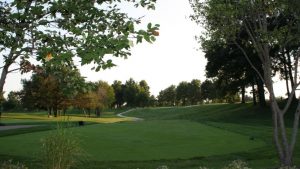
Intimidating tee shot to start the round as you have to keep in between the trees left & right. The longer hitters have the option of going up and over the trees on the left. A good drive and 2nd shot will leave you with a wedge to short iron approach into a green that falls off front & back. If the pin is up front, it is best to play short; if the pin is in back it is best to error long. A great starting hole as a birdie can be made.
#2 Par 4 / HDCP #7

Finding the fairway is critical here, as you want to hit a shot that gets far enough to get past the trees on the left but doesn’t run out into the fairway bunker straight away. If you hit a good drive you are usually left with 130 – 170 yard approach into a green that slopes dramatically from right to left. Hitting the green on your 2nd shot is important because the green sits up above the surround and can leave you with a difficult up and down. Walking off the green with a par on this hole is a good score.
#3 Par 3 / HDCP #17

A demanding par three that requires a good tee shot to hit a wide green that is narrow front to back. Make sure to check the wind before you select your club on this tee. The green slopes from right to left, with the front left third of the green severely sloped. If you are to miss this green – left is the place to be, as you will set yourself up with an uphill chip shot.
#4 Par 4 / HDCP #1

The number 1 handicap hole. Straight away, slightly uphill. Nothing fancy here, just straight and tree lined. The green is slightly slanted from right to left and does have bunkers on all the sides. Par here is always a good score.
#5 Par 4/ HDCP #5

Another important driving hole early in the round with this slight dogleg to the left. Favor the right side with your drive, as the fairway slopes from right to left, and a huge valley on the left almost ensures a bogey or worse. The second shot plays a little shorter than the yardage and the big green slopes from left to right. If you par #4 and #5 you’re off to a great start!
#6 Par 4 / HDCP #11
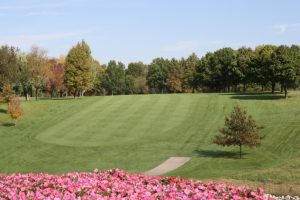
This hole’s drive is straight up a large hill. Trees on both sides, but if you miss favor the right side as you can still hit a punch shot up to the green from this position. The most difficult green on the golf course as is slopes off both left and right. Going long of this green is a big mistake as you are left with a very difficult shot. Walking off this green with a one or two putt is always a great feeling.
#7 Par 4 / HDCP #9

Not a long par four and the easiest hole on the front 9 is pretty open off the tee. A fairway bunker on the left can catch your ball as the fairway narrows at this point. If you hit the fairway you will have a short iron in your hand hitting into another somewhat undulating green that is sloped from back to front and left to right. A couple of bunker protect the green short, and going long here leaves a difficult chip shot down the hill. This is your best chance to add a birdie or another par to your card on the front 9
#8 Par 3 / HDCP #15

The longest of the par 3s at Oakwood. The biggest thing here is your alignment on the tee box. The tees aim you right and many balls end up there. The green is large and could be the flattest on the front 9. There are big bunkers on both sides and a tee shot on the green is a good shot. Having your tee shot end up short, and in front of the green is not a bad spot to be as you are left with a basic chip shot with plenty of green to work with.
#9 Par 4 / HDCP #3

A very demanding tee ball, especially from the back tees. Finding the fairway is premium on this hole, so a lot of players will hit 3 woods or hybrids to keep the ball in play. Trees line both sides of this hole as it doglegs to the left – lateral hazard runs down the entire length of the hole on the left, and the driving range is out of bounds on the right. Oakwood’s famous overhanging tree at the 100 yard marker catches many shots that are hit from the right side of the fairway. The green is large and slopes off towards the back. This is a tough hole to end the front 9, and has ruined many good front 9 scores as players head to the back 9. Good Luck!
The Back 9 holes give you a slight reprieve, but you still have to play smart. It has two par 5s and the par 4s are a little shorter than those on the front 9. Driving the ball is critical, but accuracy on your approach shots is key to shooting a good score. Usually players make a few more birdies on the back 9, but it is just as easy to make a few big numbers if you aren’t careful. Enjoy!
#10 Par 4 / HDCP #8

A slight dogleg to the left with trees along both sides. A tee ball to the left or right off the fairway can trap you behind trees and the rough on the left side is always thick. The green slopes severely from back to front, and the back right pin location is the toughest on this green. This is another hole where you don’t want to hit your approach shot long as it will leave a difficult up and down. Take your par here and move on to the next hole!
#11 Par 4 / HDCP #14
A short and straight par four that is a good chance to make a birdie or par. Some players will hit less than driver off the tee to keep it short of the fairway bunker on the right side of the fairway. The second shot is usually a shorter iron, from a fairway that slopes from right to left, to a good sized green. There are bunkers short on both sides of the green, and the green falls off on the back left corner.

#12 Par 4/ HDCP #2

Straight away, long, and tree lined. If you hit a long drive you will get some extra distance as it will roll down the hill to the flat, which will leave you with a much more manageable shot into the green. If you tee shot stays at the top of the hill you will be left with a longer 2nd shot to a difficult green that is only 17 yards back to front and 35 yards wide. Keeping the ball below the hole is once again important on this hole as putting up to the hole from the front is much easier.
#13 Par 5/ HDCP #16

The easiest hole on the course, that offers a great chance to make a birdie. A tighter driving hole than it may appear as players try to avoid the lake on the left side of the hole and commonly leave their drives out to the right and down in the valley. If you are able to commit to you shot and hit it down the fairway you are off to a good start. For the longer hitters there is a good chance to hit the green in two. If you are out of position, a lay up to the top of the hill with put you in a good position to hit a wedge close. The green slopes severely from back to front so stay below the hole to give yourself an uphill putt.
#14 Par 3 / HDCP #18
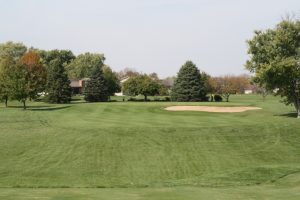
A mid to short iron approach from the tee to another wide but shallow green. A bunker up front protects the right half of this green. However, if you find the bunker it is a pretty straight-forward bunker shot. Once on the green there is some undulations that can leave you scratching you head. Ideally knock it on the middle of the green, two putt for par and head to the next Par 5.
#15 Par 5 / HDCP #6

This par 5 has the most undulated fairway. The tee ball is critical as you look to stay to the left half of the fairway. Good chance for a side hill type lie but this is the best spot. If you go right, you will fight trees the rest of the hole. The second shot narrows dramatically around the 125 yard range and it levels out to the green. The green is protected on the right side by 2 bunkers and has many slopes. Tough to get the ball close on your chip shots here. Par is a good score.
#16 Par 4 / HDCP #10
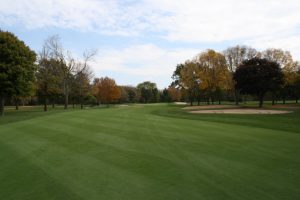
This shorter par 4 has a lot of character. A fairway bunker on the right, which make the tee ball landing zone very small, and a 43 yard green from front to back, can leave you with a long putt. Driver is not always the play with trees on both sides, as a lot of players with hit fairway wood or long iron for positioning. The second shot can vary greatly based on where the pin is located in the front, middle or back. The green is heavily bunkered on all sides, and it slopes to both sides. Long putts are a common occurrence here. Even Tiger 4 putted this hole!
#17 Par 3 / HDCP #12
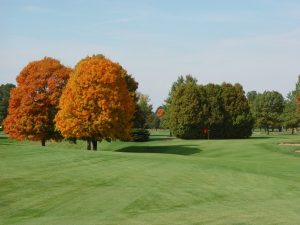
This par 3 is slightly down hill as the green runs diagonal to the tee. It is guarded by two pot bunkers on the front right, and a collection area behind the green if you go long. The green slopes from right to left and most shots come up short. If you miss short you are left with a difficult chip shot as the green is elevated from the surround. Play for the middle of the green, and try to leave yourself left of the pin so that you give yourself and uphill putt.
#18 Par 4 / HDCP #4

Oakwood’s finishing hole has recently been renovated into a very long and demanding dogleg right. The tee shot should be aimed straight away at the fairway bunker, as tee shots that get lost to the right will struggle with tree trouble for the remainder of the hole. The second shot is usually approached with a longer iron, as the green is guarded in the front by two large bunkers. The second shot will play a little shorter than the yardage represents as it plays downhill. This large green does slop off on both sides. Par is a good finish to your round, and a birdie is something to celebrate up in the 19th hole!
Oakwood Country Club puts a premium on keeping the ball in play, second shots into the greens and being able to putt the ball well. Oakwood is a traditional design that differs from the longer courses of today, but still provides golfers with quite the strategic challenge as there are many different options to play each hole. Distance certainly helps as you will be given more opportunities with a wedge, but is still no guarantee to a good score as one bad drive can put you out of position. Having a good short game is the key to scoring at Oakwood, if you are able to take advantage of the holes you put yourself in position and scramble when you get out of position, the end result will be a good score. Enjoy your day at Oakwood Country Club!
Oakwood Country Club
1067 US Hwy 6
Coal Valley, IL 61240
309-799-3153
